Starting a New Project in LiveCode Create
To begin building apps in LiveCode Create, you need to create a new project. A project is the foundation for your app and contains everything you need, including layouts, workflows, media assets, and data.
This guide will walk you through the steps to start a new project and get ready to design your app.
Steps to Start a New Project
Follow these steps to create a new project in LiveCode Create:
1. Open LiveCode Create
- Launch LiveCode Create to open the Dashboard.
- The Dashboard is the starting point where you manage all your projects.
2. Create a New Project
-
In the Dashboard, click on the "New Project" button.

-
Enter a Project Name in the popup dialog.
- Use a clear and descriptive name for your project (e.g., “Task Manager” or “Expense Tracker”).
-
Click Create to finalize and start your project.
3. Explore the App Building Environment
After creating a project, you’ll be taken to the App Building Environment. This is where you design your app’s interface, connect data, and define logic.
The key areas of the App Building Environment include:
- Canvas Area: Design your app by adding and arranging widgets.
- Tools Palette: Drag and drop widgets like buttons, input fields, and lists.
- Property Inspector: Adjust widget properties like size, color, and behavior.
- Project Browser: Manage layouts, widgets, and your project’s structure.
- Datastore: Access and manage data collections and views for your app.
4. Save Your Project
Your project is saved automatically as you work. If needed, you can also:
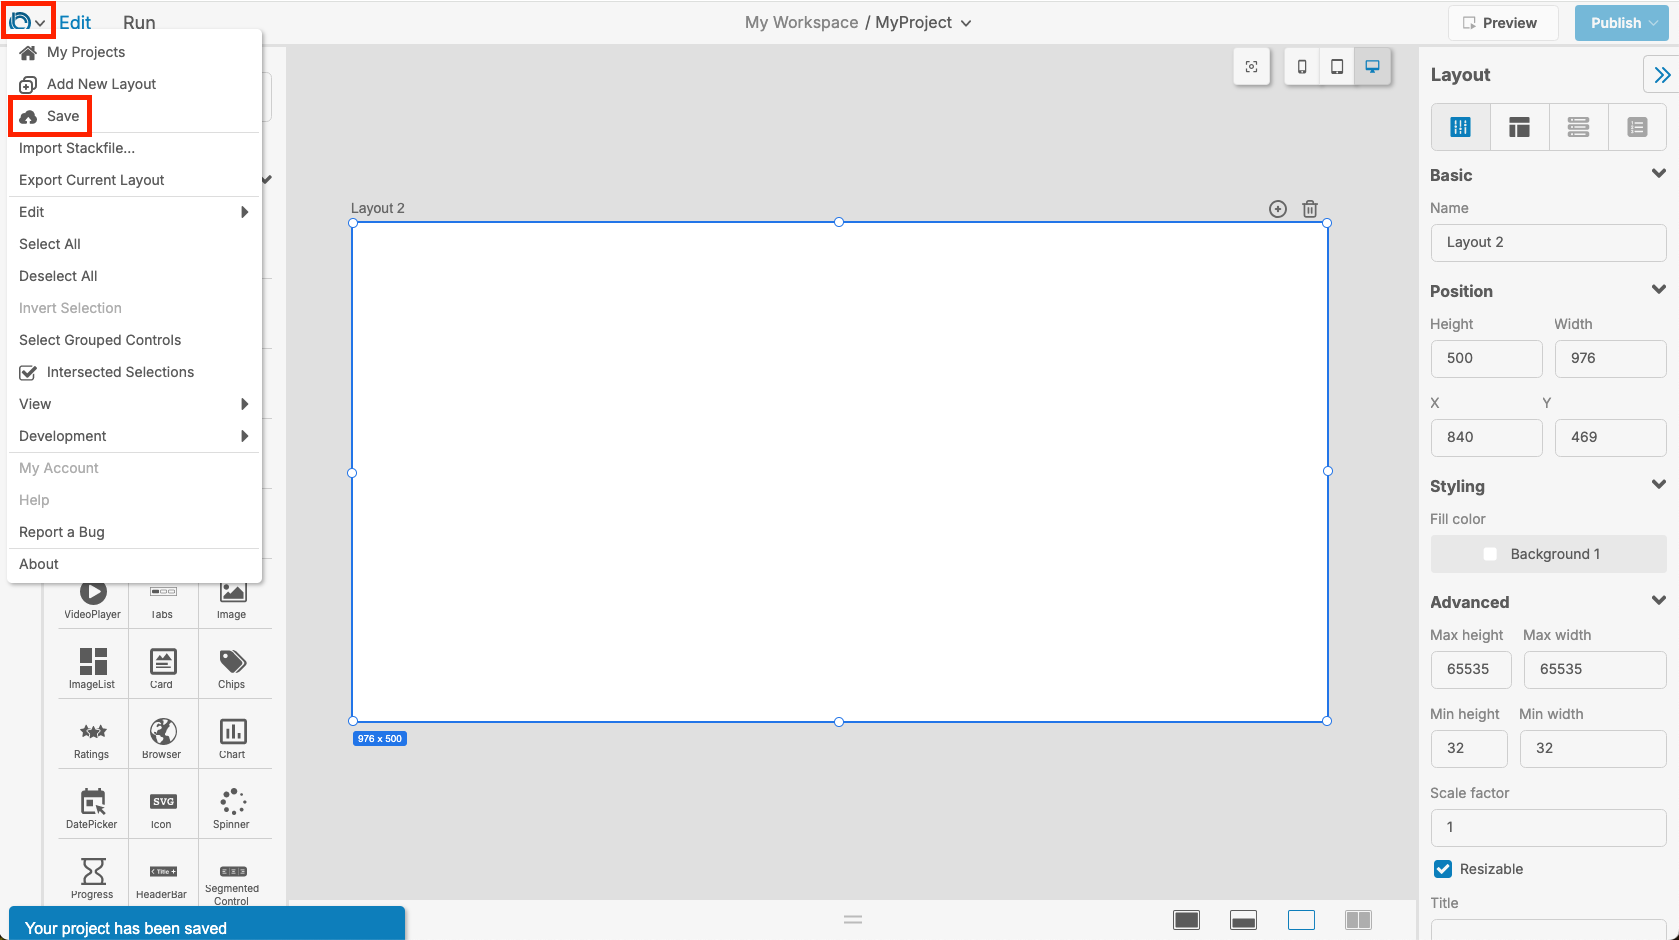
- Open top bar menu Click the Create icon in the top left to open its dropdown menu
- Manually Save: Click the Save option in the menu.

What’s Next?
Once your new project is set up, you can:
-
Create Layouts: Add screens for your app’s interface. Each layout represents a screen or page.
- Learn more: Building an Interface
-
Add Widgets: Use the Tools Palette to drag and drop widgets onto your layout.
- Learn more: Usint the Tools Palette
-
Connect Data: Create collections in the Datastore to store and manage your app’s data.
- Learn more: Working with Data
-
Define Workflows: Use the Workflow Editor to add logic, such as button actions or navigation.
- Learn more: Using the Workflow Editor
Tips for Starting a New Project
- Plan Ahead: Think about the screens (layouts) and data you’ll need for your app.
- Save Regularly: LiveCode Create autosaves, but it’s good to manually save for peace of mind.